
When you need to add minor changes to your Mac software, it is best to react quickly and use the Device Firmware Update option. Learn how to enter DFU mode on macOS.
We have prepared useful guides to let you enter DFU mode on various Mac models. Choose your model and follow the steps to complete Apple T2 Chip jailbreak with Checkra1n Jailbreak or achieve other goals.
Users with Mac computers sometimes need to use DFU mode. DFU stands for “Device Firmware Update,” which helps restore or add slight changes to your operating system.
DFU mode on macOS is closely related to the Recovery Mode. At the same time, this option offers more ample opportunities. It lets you solve some complications and issues.
As you enter DFU mode on macOS, your device has the power on while its operating system is not booted up. And since the macOS is not running, you have a chance to add changes before it boots up.
The guides below explain how to enter DFU mode on iMac Pro, iMac, Mac min, Mac Pro, and Apple portable computer.
Choose your device, and you will get into the Device Firmware Update without issues.
If you have the 2020 version of iMac Pro/iMac, this instruction is for you.
Step 1. Your iMac/iMac Pro must be disconnected from power.
Step 2. Look next to your Ethernet port. There is the Thunderbolt port there, into which you must connect the cable.
Step 3. Press the power button. Keep pressing it while you reconnect your device to power. And do not let go of the power button for another three seconds.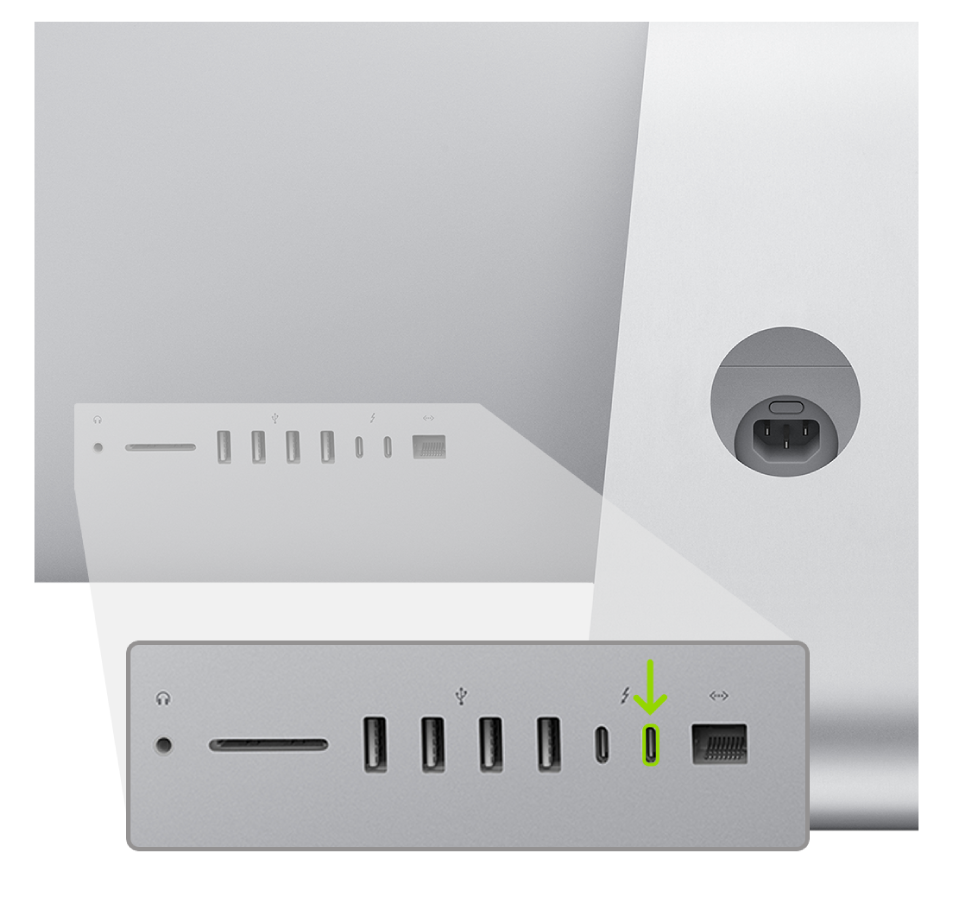

P.S. There should be no screen activity on your iMac/iMac Pro (2020) as it enters DFU mode.
Users with Mac mini have to perform simple manipulations to get into the Device Firmware Update.
Step 1. Since it is best to understand how your device performs, you have to connect your Mac mini to a monitor.
Step 2. The Mac mini has to be disconnected from power now.
Step 3. Find the HDMI port and a nearby Thunderbolt port. Connect a cable to this Thunderbolt port.
Step 4. Press the power button. Do not stop pressing it while connecting the device back to power and then waiting for about three seconds.
P.S. Your Mac mini will show no screen activity.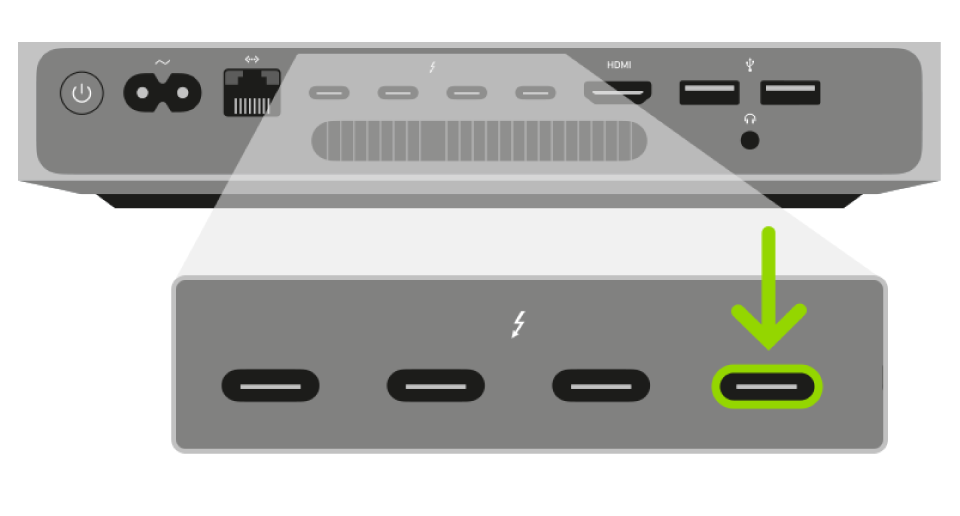
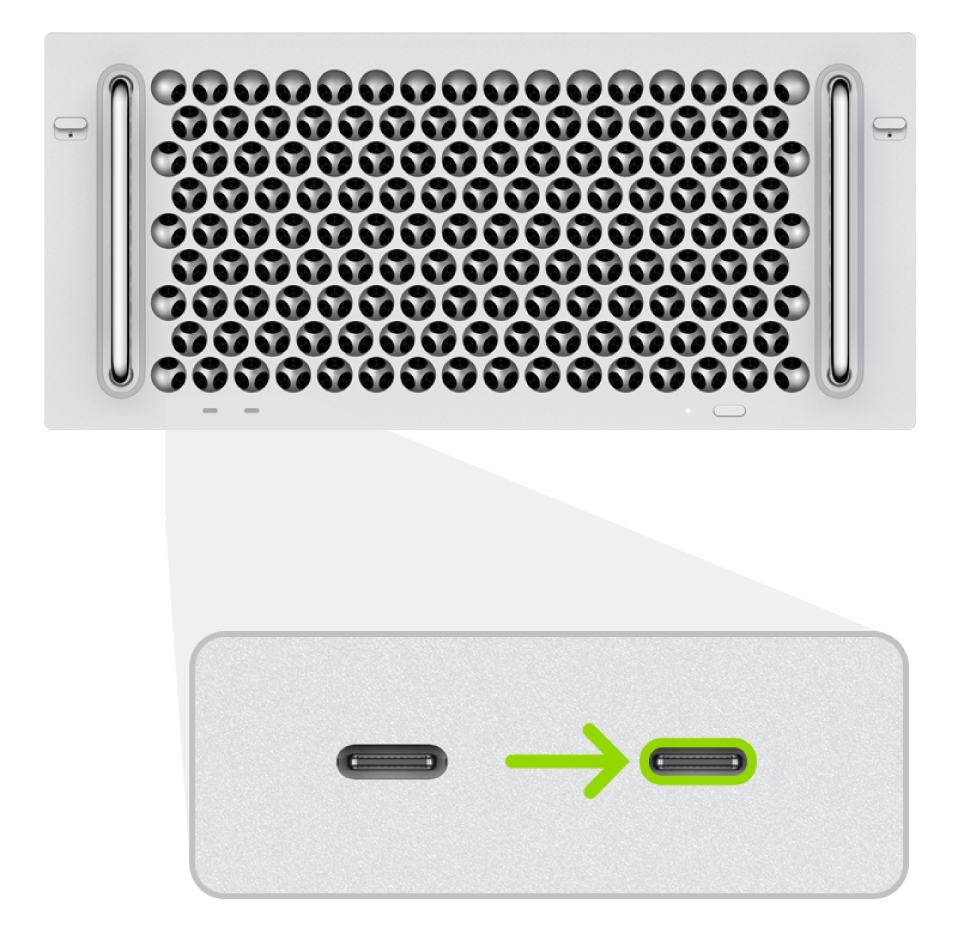
Enabling the Device Firmware Update mode on Mac Pro is simple.
Step 1. Just as it happens with Mac mini, your Mac Pro will not display the process unless connected to a monitor.
Step 2. The device has to be disconnected from power.
Step 3. If you have a desktop Mac Pro, you need to connect a cable into the Thunderbolt port, located as far from your power button as possible.
Step 4. If your device is the rack mount Mac Pro, your actions will differ. The cable needs to be plugged into the Thunderbolt port, located as close to your power button as possible.
Step 5. Put your finger on the power button, and do not let it go while connecting your Mac Pro to power and then slowly counting 1-2-3.
P.S. As Mac Pro enters DFU mode, it displays no screen activity.
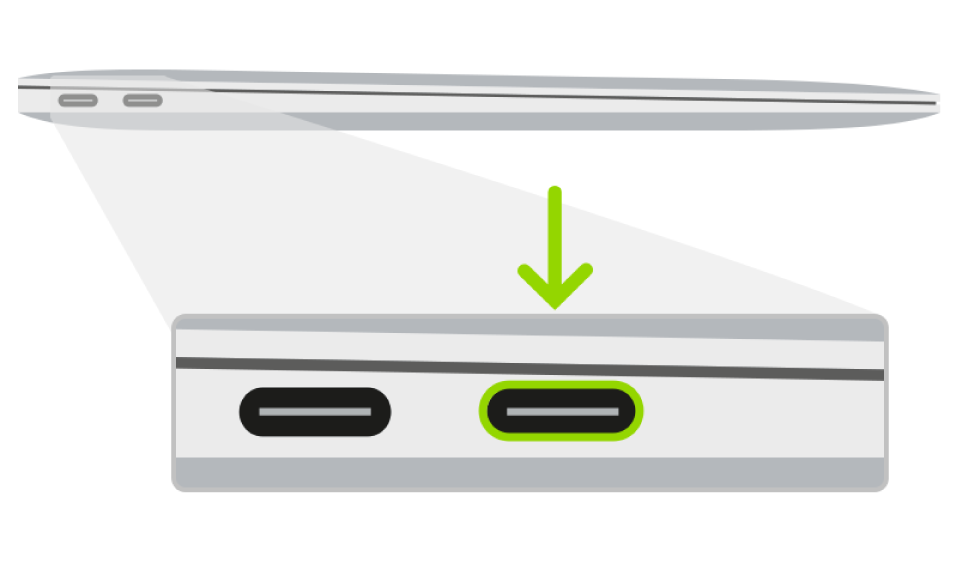
Users with a Apple Macbook Pro & Air portable computer running macOS can also get into Device Firmware Update mode without much effort.
Step 1. Your computer needs to be shut down. To make it happen, hold the wake/sleep button while slowly counting till five in your mind.
Step 2. You have to connect a cable into a portable computer. It is best to use the “left” Thunderbolt port (find it on your device’s left side).
Step 3. Press the power button and while doing so, press the three keys at once: Right Shift + Left Option + Left Control. Slowly count till three before you can release all these buttons.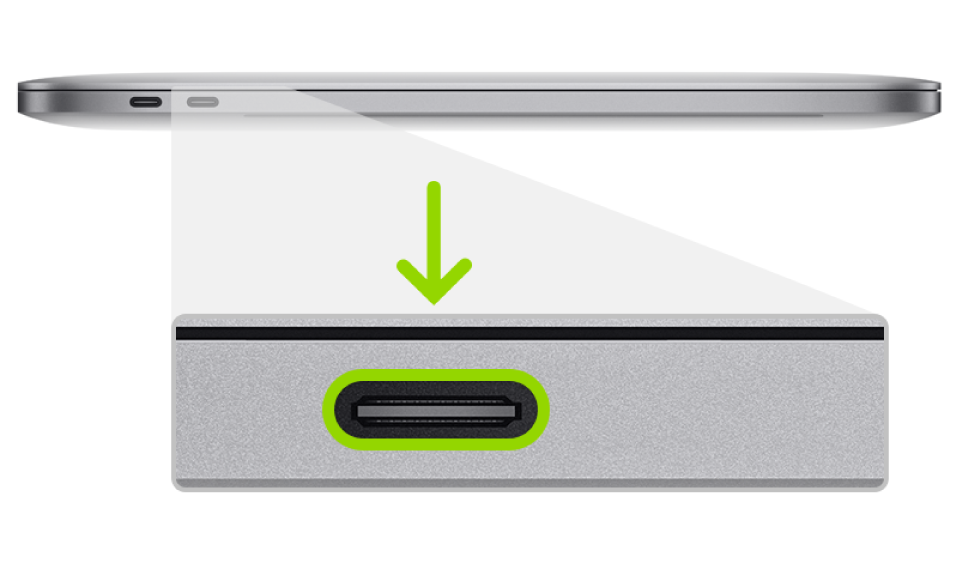
P.S. Don’t worry when your portable computer shows no screen activity. It is fine.
Now you know how to enter DFU mode on macOS devices.